CLICK HERE FOR FREE BLOGGER TEMPLATES, LINK BUTTONS AND MORE! »

9.30.2009

Altered "Marble" Coasters with Photos and Stamps

I have been wanting to make some photo coasters for a while now, and today after I dropped the Mess Maker off at preschool, I went to Home Depot to get some marble tiles...except that when I got there I decided I liked the travertine better.  :)  So I got travertine tiles.

So all is good in the world until I begin to construct them and realize that, "Hey, travertine has holes and dips and valleys....not the best surface for pasting a thin piece of tissue paper".  DUH!!!  But, since I'm just practicing at this point, I went ahead and completed them.  I didn't look up any directions, so we'll see if they actually withstand cold beverages and water rings.  :)

To start, I taped a piece of white tissue paper to a sheet of regular printer paper.  I printed my photos in black and white onto the tissue paper, then I trimmed the photos and removed them from the paper.  I used Modge Podge to adhere the photos to the tiles, being careful not to rip the tissue paper.

When it was dry, I stamped the sentiments and flourishes in black solvent ink, let them dry and then applied a layer of acrylic sealer over the entire coaster.  To protect my furniture surface, I glued a thin piece of cork onto the back of each coaster. 

Now if you look really closely, you"ll notice that there are a couple of small areas where there's no travertine under the photo and I know that it's only a matter of time before the photo rips through in those spots...but I guess at that point I can just tell the Household CFO that I need to go buy more tiles, more stamps, more ink, etc. so I can make new ones...see how my mind works???   :)

9.29.2009

3D Cupcake Giftcard Holder


This is probably one of my most favorite projects to date!  I just love this little thing and I really think it looks good enough to eat!!!  Not only is it just too cute to look at, it also holds a giftcard, hidden inside the cupcake!!! 


The idea came from the Stamp Goddess (Fabulously Artsy) and her YouTube video called "Hey, Cupcake".

The detailed, step-by-step instructions are included in that video.  But just to give you a basic understanding of what's involved, here's what I did:

1.  Used my Expression (George) to cut a 6" chipboard circle.  Snipped edges and folded up to form cupcake base.
2.  Accordian-pleated patterned paper to cover chipboard circle.
3.  Cut a styrofoam ball in half then added foam dots along two sides to hold the two halves together.
4.  Add layers of pleated ribbon, flowers (cut from Tags, Bags Boxes & More cartridge), crumpled paper, ribbon, and flowers.
5.  Glued painted wooden bead to top of small binder clip to make the "cherry" and used crumpled paper to make "whipped cream".  Glued whipped cream around cherry.
6.  Insert giftcard into binder clip, then insert inbetween two halves of styrofoam ball.
7.  Embellish with glitter glue.

Here's a view from the top:


Thanks for looking!!!


9.27.2009

"Autumn" Banner For The Mantle

I have to admit that I have had Cricut Design Studio for about two years and have NEVER used it!!!  So the other night, after watching an infomercial for the new Cricut Gypsy, I decided to play around with it...OMG!  It's AWESOME!!!  So much easier than I anticipated and sooooo many features that help customize your creations.  LOVE IT!!!  So now I don't feel like I need to run out and purchase the Gypsy on the release day!  :)

This banner is a creation that meets the criteria for several current challenges:
1.  SPCC:  Hoppin' Combo (orange, green, light brown, dark brown color combo)
2.  Creative Belli Blog:  Create a fall/halloween themed item
3.  Use It Challenges:  Challenge #27
4.  Practical Scrappers:  Blog Hop Challenge

To make the triangles for this banner, I used the birthday hat image from Doodlecharms.  I resized and stretched the image in DS and then cut them out on dark brown cardstock.  Then I cut the same triangles out of this beautiful Basic Grey paper and adhered them together.  Because the short edge of the triangles were somewhat rounded (that's how the image is cut), I had to use my trimmer to cut the edge into a straight, even line to form a perfect triangle.

Using scraps from the patterned paper, I cut 1/2" strips the same length as the tringle edges, cut them with scallop-edge scissors and glued them on all three sides of the triangles.  Then I inked all edges.  I punched holes in each upper corner and connected the triangles with light brown ribbon.  To make the charms, I cut small leaves from Doodlecharms, inked the edges, and then muted the tops with chalk ink.  Using a needle and thread, I attached them to each bow, allowing them to dangle between the triangles.


To spell "AUTUMN", I used the Storybook cartridge and cut the letter bases out of dark brown cs.  I cut the accent/layer out of medium brown and matted them on the back instead of the front.  Using a flourish stamp covered in liquid glue, I then stamped randomly over each letter.  I sprinkled brown flocking over the glue and shook off the excess.  I heated the flocked images with my embossing gun to set the powder.
For the first and last triangles, I cut leaves from Storybook out of dark brown cs and flocked them as well.  I also cut an acorn out of orange cs (using Doodlecharms) and inked/distressed it.  I added two layered flowers with a brad center and layered the embellishments on the triangle.
To finish, I took the flourish stamp I used to do the flocking, and used dark brown ink to stamp randomly over the triangles around the letters.  It was a somewhat time-consuming project, but I LOVE the results!!!
Thanks so much for looking!!!  :)

9.25.2009

A Visit From The Cousins!

The Mess Maker and Noise Maker had a visit from their cousins this past weekend...the kids had a blast together.  It was an activity-filled weekend and I'm still recovering!!!  :)

We went to the Farm/Petting Zoo, rode the train, rode horseback, went to the Children's Museum, went to the mall, rode the carousel, visted a pet store, went to the Disney Store, ate lunch at the food court, went shopping for rubber ducks at a bath shop, went to the best toy shop in the world, ate lunch out at a restaurant, had ice cream, and.......the list goes on and on!!!  Here are just a few pictures of the kids...


P.S.  I snapped this photo of the Household CFO very obviously having a GREAT time at the children's museum...sorry your golf day got rained out!!!


9.24.2009

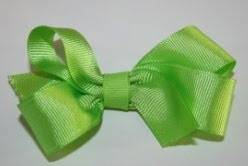
How To Make Hairbow Clips For Girls: Step-By-Step Tutorial


If you have little girls, you know how EXPENSIVE those little ribbon hair bows in the boutiques are.  And if you're like me, you turn up your nose at the ridiculous price tags and decide to do it yourself!!!  Since I've been asked many times how to make them, I thought I'd provide and easy step-by-step tutorial...keep in mind that this is how I do it, and it may differ somewhat from those that you see in stores (but it WILL look like the photo above):

To start, you will need the following supplies:
1.  About 18" of 7/8" grosgrain ribbon
2.  About 12" of coordinating 3/8" ribbon
3.  Metal Single Prong Clip (aka Alligator Clip)
4.  Craft Wire (I used 32 gauge)
5.  Scissors
6.  Hot Glue Gun

To make the hair bow:
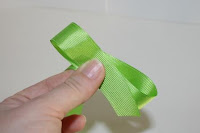
1.  Make a loop and hold it between your thumb and first finger:


2.  Wrap the ribbon back around to make a second loop of the same size and hold in place:


3.  Repeat the above step, placing the third loop to the side (diagonal) of the first loop:


4.  Make a fourth loop across (diagnoal) from the third loop and hold in place:
5.  Now using your thumb and first finger, pinch the center of the bow together:


6.  Now take a small length of craft wire and wrap it around the middle of the bow (where you are pinching it) and twist it like you are twisting a twist-tie on a bag of bread:
7.  Wrap the ends around the bow to hold the wire in place and make a nice tight pinch in the center of the bow:
8.  Set the bow aside.  Take the alligator clip and place a small drop of hot glue on the inside of the top part of the clip and glue down the end of the narrow ribbon.  Then add a thin line of glue along the length of the insde of the top part of the clip and glue the ribbon down:


9.  Place a thin line of hot glue along the opposite side of the clip, glue ribbon down and continue to place glue along the outide of the clip and gluing ribbon down, to completely cover the clip.  Trim excess ribbon off:


10.  Place a small drop of hot glue in the middle of the underside of the bow and glue bow to the center ofthe clip:


11.  Glue another small piece of narrow ribbon on the center of the bow to hide the wire.  When dry, wrap the ends around to the underside of the clip and glue ends in place.  Trim off excess ribbon:


12.  To finish, fluff bow and shape as desired.  That's it!  If you have any questions, please feel free to email me:  TheHouseholdCEO@live.com.  Thanks for looking!


9.21.2009

I WON, I WON!!!! My first challenge win! WOO HOO!!!

I just realized that I was one of two winners over at Practical Scrappers for the Practical Scrappers Letter Sticker Challenge...woo hoo!  It's the first time I've won a challenge since I started entering them a few months ago.  I'm so honored and excited!  It's a fun challenge blog so you should check it out when you a few minutes to drool over some beautiful creations...

Here is the card that I entered for the challenge:


9.20.2009

File Folder Accordian Tag Album

My friend is a CTMH consultant and had a "Fit Folios" album class the other night where we made accordian albums from these 12 x 12 file folders used to hold memorabilia in scrapbooks.  I thought it was a pretty clever idea and decided if it could be made from those, it likely could be made from a regular cheapo file folder from the office supply store...and I was right!  :)
To make the album, I opened the file folder and folded it the opposite way.  I then folded it in half, and then folded each side in half again, to form four 4 1/2" rectangles.  Then I creased all the folds with my bone folder.  To adhere the pages, I ran my tape runner along each crease (on the inside of the file folder) and then on the very outside edges as well.  Then I folded it back up, accordian style, and it made four pockets, one on each folded page.

I used some coordinating papers from Imaginisce and covered both sides (8 rectangles total).  I used my old school CM circle cutter to cut half circles at the top of the inside pages (my friend's idea)...then cut the patterned paper to match.  I inked all the edges and embellished it with die cuts from my Cricut:  frame, italic sentiments, flowers, hearts (HD), title (OA).  I also added several stamped journaling spots.

To make the tags, I cut coordinating cardstock slightly smaller than the pocket size, about 4 1/4 wide by 5 3/4 long.  I rounded the corners, inked the edges and punched a hole in the top for ribbon accents.  The front page tag has to be slightly narrower to fit in the pocket, as the tabbed portion of the file folder makes that rectangle just slightly smaller.

And that's it...super easy, super quick, and super fun!  TFL!!!  :)