CLICK HERE FOR FREE BLOGGER TEMPLATES, LINK BUTTONS AND MORE! »

7.31.2009

New dress....


The Mess Maker's grandma got her a pretty new dress and she acts like a princess when she's wearing it!

The Mess Maker and Noise Maker are excited to have grandma and grandpa in town for a visit! :)

7.29.2009

New Weight Loss Goal

It's time for setting a new weight loss goal now that the baby weight is gone...hmmm, what should it be??? I obviously can't do the 10% goal b/c then you would know how much I weigh!!! :) So, I must be more creative...

Since I have about 55 pounds I'd like to lose to get to my "goal weight", I think I'll set mini 10-pound goals. 10 pounds seems so much less daunting than 55! :)

So there it is: 10 pounds at a time. And since I'm down one more from my pre-baby weight, only 9 more to go...woo hoo! Now I need to think of a nice reward for reaching these mini-goals...any ideas???

7.28.2009

Recipe: Southwest Turkey Burgers

This is another recipe from my new favorite Cook Yourself Thin cookbook. I have always been hesitant to try turkey burgers...for some reason they just never sounded appealing to me. :) But when we had some friends over for the Fourth of July and decided to cookout, I knew I needed something low calorie instead of the foods I typically eat at a get-together like that. I found this recipe and tried it...soooooo yummy! Even one of my guests ate it and raved about it!!!

1 1/3 pounds lean ground turkey
4-oz. can diced green chiles, drained
1/4 tsp. salt
1/4 tsp. black pepper
2-3 spritzes canola oil in spritzer
3 ounces 50% reduced fat pepper jack cheese, cut into 8 slices (all I could find was fat free and it was still delicious!)
4 whole wheat kaiser rolls
Romaine lettuce leaves
Tomato, sliced
Red onion, sliced
1/2 avocado, sliced

1. In a large bowl, mix turkey with chiles and season with salt and pepper. Shape into patties and refrigerate until ready to cook.

2. (I omitted this step and just threw them on the grill!) Heat a large grill pan or skillet on medium heat and spritz with oil. Add the turkey patties and cook until browned on one side, about 4 minutes. Flip, reduce the heat to low, cover and cook until the juices run pale pink, about 4 more minutes. Top with pepperjack cheese during the last minute.

3. Toast the rolls in over or toaster over. (Or grill them 1 minute on each side!)

4. Place burger on roll, top with lettuce, tomato, onion and avocado slices.

4 servings

7.27.2009

Craft: Baby Shower Invitation

My sister had a baby shower in February and I made these invitations...this is the lelf half of the invitation (the right half is just the printing from the computer)...

I used my Cricut for the embellishments: New Arrival cartridge for the stork and baby, George for the flowers. I added rhinestones to the flower centers, wrapped tulle around the baby and tied with a ribbon. Everything is attached with foam adhesive squares for dimension.

P.S. It was a girl!!! :)

7.26.2009

Weight Loss Update #2a

This was a big week on the weight loss front...I finally shed those last "baby weight" pounds. Woo hoo!

Total weight loss for this week: 3 pounds

I have GOT to start working out on a regular basis...I'm hoping that the Noise Maker will start sleeping better at night (although after last night, I'm not thinking that's going to be anytime soon!!!)...then maybe I'll have enough energy to stay awake and move my body...

I'll keep you posted! :)

7.24.2009

Weight Loss Update #2

It hasn't been quite a week since my last update, but I just had to share my news. As of today, I did it.....

THE BABY WEIGHT IS GONE!!!

Woo hoo! Can you tell I'm excited? :) My goal was to lose all 65 pounds by the time the Noise Maker turned 4 months old, and I still have a few days! Can't believe it's gone, but soooooo happy it is! Now it's time for new goal-setting...

7.21.2009

Torticollis Update: Physical Therapy Progress

Well, it's been two months since the Noise Maker started physical therapy for the torticollis. We have seen a TON of progress...he is able to rotate his head in both directions and maintain midline position when sitting! Today, his physical therapist told me she is reducing his therapy to every other week...woo hoo!

Check out the difference in his head position in the top photo (taken yesterday) compared to the bottom photo (taken about two months ago)!


7.19.2009

Weight Loss Update #1

When I started my "diet" (aka lifestyle change) on June 1, it was just over 2 months since I had the Noise Maker and I had lost 33 pounds on my own. Not really sure how, as I definitely was not eating well, and I know I didn't give birth to a 33 pound baby... Large? (9 lbs, 4 oz) Yes. 33 pounds large? No!

Anyway, so I started the diet 32 pounds over what I weighed before the pregnancy. At the time I started my blog a couple of weeks ago, I was down 25 more pounds. That left me with 7 more pounds to go before I was my "pre-baby" self. Now that you're up to speed....

Weight loss for the past week is...........4 pounds! Woo hoo! :)

Only 3 more pounds to go before I'm back to my old self. Although at that point, my "self" will be redefined and I will set my new weight loss goal of losing that extra bulge that I can't blame on pregnancy!!!

More updates to come... :)

Honey-Glazed Spiced Pork Tenderloin

Another one of my favorite cookbooks is "The Most Decadent Diet Ever" by Devin Alexander, who also authors the Biggest Loser Cookbook. This recipe combines both sweet and spicy, and looks good enough to serve to guests...they'll never know it's diet-friendly! The Household CFO loves this one, too!

Ingredients:
2 tsp. paprika
1/2 tsp. salt
1 tsp. freshly ground black pepper
1/4 tsp. onion powder
1/8 tsp. chili powder
1/8 tsp. cayenne
1 1/4 pounds trimmed pork tenderloin
1 tsp. extra virgin olive oil
1 T + 1 tsp. honey
1 T fresh minced garlic
Olive oil spray

1. Preheat oven to 350 degrees. Use a fork to mix paprika salt, pepper, onion powder, chili powder and cayenne in small bowl.

2. Rub tenderloin evenly with the olive oil. Then rub spice mixture evenly over it until thoroughly coated. Cover loosley with plastic wrap and let stand for 15 minutes.

3. Meanwhile, whisk honey and garlic in a small bowl.

4. Place a large nonstick skillet over med-high heat. When hot, mist with oil spray. Cook tenderloin 1-2 mintues per side, on until just browned on each side.

5. Place tenderloin in roasting pan. Use a pastry brush to evenly coat meat with the honey mixture. Roast, uncovered, for 16-18 minutes, on until just barely pink inside (I like mine well done, so I cooked it a little longer), or until a meat thermometer reads 155 degrees.

6. Remove from over, loosely cover with foil and let stand 10 minutes. Transfer meat to a cutting board. Holding knife ata 45 degree angle, slice tenderloin into thin slices. Serve immediately.

4 servings

7.18.2009

Craft: Duck Canvas

The Mess Maker LOVES ducks and started collecting little rubber duckies a while back. When we moved into our home a little over a year ago, I decided to decorate her bathroom with a duckie theme. I couldn't find a wall-hanging that I thought really matched the shower curtain, so I decided to make my own "art". I drew the duck by hand onto patterned scrapbook paper, using the duck on the shower curtain as a guide. I used my Cricut (All Mixed Up cartridge) for the "splish splash". I painted the canvas, glued the paper pieces down then modge podged it so it would resist warping in the humidity. I might have to modify it now that the Noise Maker is here...probably a little "girly" for a boy!!! :)

Colic? What colic?

The Noise Maker is such a smiley boy lately...his "colic" phase seems to (hopefully) be disappearing, at least for the past week or so. Still not sleeping very well at night...up around every 1-2 hours, but the days are getting better. Woo hoo! A happy baby = a happy mom. :)

Snapshots from today...


New Application on my iPhone

I recently got an iPhone (wow, didn't know what I was missing!) and was browsing through the thousands of applications you can get, and I found one called "Color Splash". Since I'm a scrapbooker, and love photography, this was something that really caught my attention. You take a picture with your phone, then upload it to Color Splash and it converts it to black and white. Then you can choose the sections of the photo to return color to. Soooo cool! I took a sample picture of the Mess Maker in a colorful dress and sunglasses then modified the photo in Color Splash and this was my result. Loving it!
7.17.2009

Best Pasta Sauce Ever!

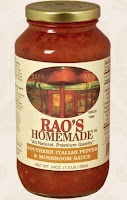
I recently discovered this pasta sauce at our local grocery store...it's dynamite! A little pricey compared to the common brands of sauces out there, but so much tastier! And, since we're not going out to eat as much now that I'm dieting, it's still cheaper than a meal out at a restaurant, so I let myself splurge on this. It's all natural, no artificial ingredients. I always get the "Southern Italian Pepper and Mushroom Sauce"...try it, you'll love it!

Oh, and it's sugar-free which is great for the low GI diet! :)

(click on title above for Rao's webpage)

Cool Website for Journaling

I typically don't use my own handwriting on my scrapbook pages because I'm afraid I'll mess up or spell something incorrectly, but I would love for my pages to have that personal touch. And I've found the solution: "yourfonts.com"!

This website will turn your handwriting into a font...it costs about $10 and will create a digital font from your handwritten sample (you scan it and then upload it to the website). I love my new font and will use it all the time now for journaling on my pages!

Visit: http://www.yourfonts.com/

Craft: "CREATE" Curtain Rod Decoration

I used to share my scrapbooking space with the Mess Maker in the downstairs bedroom. But we decided to convert our upstairs gameroom into a playroom, and put the guestroom downstairs so our guests could have their own bathroom (instead of sharing one with the Mess Maker!)...so, that left the old guestroom empty. Hmmm...what could we possibly do with it? Oh, I know! :) I snatched the room for myself (and my ever-growing stash of supplies)!

I decided to do a black and white theme throughout the room, with a taupe-gray color on the walls. I LOVE the elegant, grown-up look (compared to the bright juvenile colors of the playroom!). I made some curtains with a black and white fabric but decided the window needed something more. Then I got the idea to add the letters of the word "CREATE"...a perfect description of what I use the room for.

So here is my latest craft...I used my Cricut to cut the frames (Accent Essentials cartridge) and backed them with white cardstock, then cut the letters (Opposites Attract cartridge) and used a liquid adhesive pen to attach them to the frames. I finished the frames off with some swirl clips and ribbons... Hope you like it!

7.16.2009

Craft: Painted Flower Wall Canvas

When I saw this flower wall art in the Pottery Barn Kids catalog (click title above for Pottery Barn Kids website), I fell in love it...but I didn't love the price. So I decided with the help of my little friend the Cricut, I could probably re-create something pretty similar. So, I cut out a large flower and used just one petal for a template (for both the flower petals and leaves) to trace around on some canvases I bought at half price at Hobby Lobby. Then I painted them and ta-da! Much cheaper, and still pretty cute for a little girl's bedroom wall! Here's my result:

Handy Kitchen Gadget

I was at Sur La Tab with my neighbor the other night and found this handy little gadget. I apologize in advance that I don't know what it's called (sorry!), but it's really cool and I had to share... It's a measuring device that's great for measuring sticky ingredients like honey, mayo, peanut butter, etc. You adjust it to how much you need, fill the opening, then push it out! No scraping or scooping the sides/bottom of the measuring spoon/cup! It includes measures for oz., Tbsp., tsp. and mL. Neat, huh?

7.15.2009

This will make you smile!

It's pretty easy to make the Noise Maker smile, but today he was in an especially happy mood! Had to share this one... :)

How the diet works...

I've had several inquiries about how I'm losing the weight, so I thought I'd share my "program" with you.

When I was pregnant with the Mess Maker, I gained 65 pounds. It took almost an entire year to shed those pounds, but I honestly wasn't making a whole-hearted effort. So after gaining 65 pounds again when I was pregnant with the Noise Maker, I decided I couldn't wait that long to get rid of the buldge! Plus, I had some extra weight from before I ever had kids that I wanted to get rid of as well. So, when I received a flyer in the mail from my primary care physician announcing her new weight loss program, I decided to talk to her to see what it was about...soooo glad I did!

The program is a comprehensive weight loss program that is medically supervised. The goal is to provide a safe, effective program with the emphasis of improving overall health. After an initial physical and blood work, I was given a folder with bi-weekly lessons to complete, with dietary information and a food journal in which I was instructed to record everything I ate. Most importantly, it included information about the Glycemic Index.

The Glycemic Index refers to how fast the body can break down carbohydrates into glucose (sugar). Foods with a high GI are broken down faster than foods with a low GI. Typcially, the longer it takes the body to break down the food, the better it is for you. My physician gave me three lists: one for low GI food choices, one for medium, and one for high. I was told to eat only from the low GI food list for the first two weeks (which was quite an adjustment!). It basically eliminated all processed foods from my diet. After that, I was able to gradually introduce some medium GI foods, but not more than 5 times per week. And the high GI foods are not supposed to be consumed more than 1-2 times per week, if at all.

In addition to the GI program, I was given an appetite supressant and and exercise program. I will admit that exercise isn't my most favorite pasttime and I haven't been incorporating it like I should. But I consider this a work in progress...and I'm staying positive that small, gradual changes will lead to big results in the long run!

So that's it in a nutshell...so far, I'm enjoying trying to new foods and challenging myself to modify recipes so they meet the low-GI guidelines. I'll keep you posted on my progress! :)

She loves the water...


The Mess Maker has always had an adversion to new and different textures, which is characteristic of a Sensory Processing Disorder. She is currently receiving Occuaptional Therapy and has made GREAT progress...she used to have horrible fits if any new or different texture were to get on her hands or arms (or feet), but she's now exploring play-doh, sand, dry rice/beans, sticky foods, etc. and is tolerating them just fine! What great progress she has made in the last 6 months with her OT!
One thing she had never had an issue with, though, is water. It just happens to be one of those sensory experiences that helps rather than scares her. From almost day one, she has loved baths, swimming, playing in the sink, etc. These pictures were taken yesterday at our neighborhood pool.

The guys & the girls...

Snapped these last night right before bedtime...

Recipe: Sweet and Sour Pork Chops

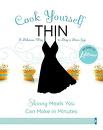
My new favorite cookbook has to be the "Cook Yourself Thin" cookbook, after the "Cook Yourself Thin" show on Lifetime TV. LOVE IT!!! All recipes have just half the calories of the original dishes. My most recent discovery was the "Sweet and Sour Pork Chops". Sooooo good...even the Household CFO raved about this one!

Ingredients for Pork Chops:
1 T sherry
1/4 tsp. pepper
2 T low sodium soy sauce
1 1/2 tsp. sugar
1 lb. (1-in. thick) boneless pork chops, trimmed of fat, and cut into 1 in. cubes
2 T pineapple juice
1 T ketchup
1/2 tsp. white vinegar
3 T canola oil (I used olive)
1 red onion, peeled, trimmed and cut into 1 in. cubes
2 red and/or green bell peppers, stemmed, seeded, and cut into 1 in. cubes

Ingredients for the Brown Rice:
1 1/2 C brown rice
3 C chicken stock

1. To make rice, bring stock to a boil in a saucepan and add rice. Cover with lid and let simmer 20-230 minutes. Using a fork, fluff and serve.

2. To make the pork, combine the sherry, pepper, 1 T soy sauce and 1/2 tsp. of the sugar in a bowl. Add pork and gently toss to coat. Let marinate in fridge.

3. Stir together pineapple juice, ketchup, vinegar, remaining soy sauce and remaining sugar in a small bowl.

4. Heat 1 T oil in nonstick skillet over med-high heat. Add onion and cook, stirring occasionally until browned, but still a little crisp, about 2 min. Transfer to a large dish. Heat another T of oil in same skillet. Add peppers and cook, stirring occasionally, until browned but still a little crisp, about 3 min. Transfer to same dish.

5. Heat remaining T of oil and add pork cubes, arranging in single layer. Cook, undisturbed until a golden-brown crust forms on bottom, about 1 1/2 min. Turn cubes over and cook until golden-brown on the other side, about 1 1/2 min. Return onion and peppers to pan and toss to combine. Add pineapple juice mixture and cook, stirring, until sauce evenly coats everything and thickens slightly, about 2 minutes. Serve immediately.

Serves 4.

Craft: "Thanks" card

I'll admit it...I'm a scraplifter. I see ideas in magazines or online and "oooh" and "aaah" over them until I re-create them for myself. And since I usually make batches of cards rather than just one of each kind, any changes I make (to make it more of "my own") have to be somewhat easy to duplicate. Sometimes, I pretty much re-create exactly what I see. This card (above) is one of those that I pretty much just kept as I saw it, except for the sentiment. Loved the contrast of the black card with the bright colors.

Original "Mom card" (below) by Michelle St. Clair, was featured at:
http://www.papercraftsmag.com/articles/Mom_card


7.14.2009

My guy...

Had to share this photo of my little guy (aka The Noise Maker):

Craft: Cricut Design T-Shirts & Bag

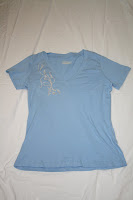
Here is my latest craft project...t-shirts and a bag that I embellished with iron-ons that I cut with my Cricut machine! I used iron-on transfer paper (purchased at Office Depot) directly in my Cricut to create these designs:


This one is my fav! Love the sporty look it gave the plain gray t-shirt. I used the Graphically Speaking cartridge for the "old SCHOOL" logo, printed on plain white iron-on transfer paper:

This one was made with the Home Decor cartridge. I copied a piece of patterned paper onto the iron-transfer paper, then cut the design with the Cricut...gives it a "patterned" flourish instead of a plain white cut-out:

Here is one of the Mess Maker's plain pink t-shirts. I used the Home Decor cartridge again to make the bird cut-out on plain white iron-on transfer paper:

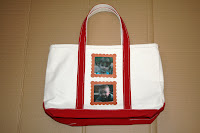
This is a plain canvas tote bag that I used the Accent Essentials cartridge for. I printed a red background onto the iron-on transfer paper, then cut out the frames from the red background. Then I printed a picture of the Mess Maker and the Noise Maker and cut them to fit inside the frames:
Hope you enjoy! :)

7.13.2009

The Mess Maker's DOC Band

Casting for the DOC Band helmet First fitting and adjustment

This is the Mess Maker at about 6 months old being casted for and then fitted for her DOC Band corrective orthotic helmet. We are hoping to be able to avoid this course of treatment for the Noise Maker, as it is very costly and time consuming, especially since the closest Cranial Technologies (maker of the DOC Band) to our home is about 3 1/2 hours away!

These helmets cost $3,000 and most insurance companies do not pay for them (or at least try not to), claiming they are "cosmetic" in nature. If left untreated, plagiocephaly has been noted to cause difficulties for the baby later in life and has been linked to visual, hearing and oral disturbances as well as developmental delays. Shortly after the Mess Maker's helmet casting, we received notification that the helmet would not be covered by United Healthcare.

Thus, my battle with the insurance company to gain reimbursement for the helmet began. United Healthcare gave us the "cosmetic" excuse for denial of coverage and said they would not be reimbursing us for even a portion of the cost. I sent what I call a "mild appeal" at that point, which was denied. So for the next six months, I researched and collected any and all information on the subject of torticollis and plagiocephaly. We sought medical opinions from many different specialties, including an orthotist, a pediatric plastic surgeon, two physical therapists, a nurse specializing in custom orthotics and of course the Mess Maker's pediatrician. Each of them submitted letters stating the medical necessity of the helmet and those letters along with my 10-page appeal and over 200 pages of research and information in support of my case was bound together and sent in as my second appeal to United Healthcare. Two months later, we had our reimbursement!

We are in the minority of those familes that receive reimbursement...so I shared, and continue to share, my appeal packet with any parent that requests it so they can hopefully get the reimbursement they so much deserve.

Click on title "The Mess Maker's DOC Band" above for information about plagiocephaly.

Torticollis Update


The Mess Maker (above) was born with a condition called Torticollis, which is a shortened or tighted muscle in the neck (click on "Torticollis Update" above for more information). We didn't realize she had this until it had started to cause the side of her head that she always slept on to become flattened. This is known as plagiocephaly. She went through two courses of physical therapy to address the torticollis, but because her plagiocephaly had become so severe, she had to be fitted for a custom orthotic helmet known as a DOC Band. She wore the helmet for 23 hours a day to correct her head shape. After two months of weekly trips (a 4-hour drive each way!) to her helmet doctor, she had a beautifully-rounded little noggin!!!
Early on, we realized that the Noise Maker (above) was born with the same condition...argh! This time, we started repositioning and physical therapy a lot sooner and he is making great progress. His physical therapist said she'd never seen siblings that both had torticollis...just our luck!!! :) He is starting to rotate his head to the right and the plagiocephaly is not nearly what his sister's was at this point. We're hoping that we can avoid another costly helmet!!!

7.12.2009

Great Song with an Important Message...

By Diamond Rio, courtesy of YouTube

7.11.2009

Craft: Baby Shower Thank You Card


One of the best purchases I've made (okay maybe it was purchased by the Household CFO, but who's keeping track?) is my Cricut Expression die cut machine. LOVE it!!! I have purchased more cartridges than I should probably admit, but I'm able to cut almost anything you can think of with the push of a button. I used the New Arrival cartridge to make the pea pod die cut for this card. I made a set of 50 of these for my little sister after her baby shower. She had a little girl, but it could easily be adapted for a boy as well. Enjoy!

Recipe: Fajita Salad with Salsa Vinaigrette


This is a recipe from the Weight Watchers "Take Out Tonight" cookbook, under "Viva Mexico". Definitely doesn't taste like a "diet" salad. The dressing is absolutely delicious!!!

Ingredients:
1/2 cup prepared salsa
1/4 cup chopped red onion
2 T fresh cilantro, chopped
1 T fresh lime juice
1 T balsamic vinegar
1 tsp. Dijon mustard
1/4 tsp. salt
4 (1/4 lb.) skinless, boneless chicken breasts
1 T cajun seasoning
1 tsp. olive oil
4 C. mixed salad greens
1 red bell pepper, thinly sliced
1 yellow bell pepper, thinly sliced
1 tomato, chopped
1/2 avocado, peeled and chopped

1. To make vinaigrette, puree the salsa, onion, cilantro, lime juice, vinegar, mustard and salt in a food processor or blender. Transfer to a bowl and set aside.
2. Sprinkle both sides of the chicken with the cajun seasoning. Heat a medium nonstick skillet over medium-high heat. Swirl in the oil, then add the chicken and cook until lightly browned and just cooked through, about 4 minutes on each side. Transfer the chicken to a cutting board and let stand 5 minutes. Then slice into 1/2 inch thick strips.
3. Place the salad greens and bell peppers in a large bowl. Top with chicken strips, tomato and avocado. Serve with the salsa vinaigrette.

4 servings

How I'm going to "blog"...

There are really three topics I want to share with the creation of this blog. The first is obviously updates and information about my kids and family. The second is my love of scrapbooking (I have an entire room in my home dedicated to this obsession!). And the third is my so-far-successful weight-loss plan (5 weeks and 25 pounds lost so far!) and the recipes I've found to support this effort.

Each week, in addition to any posts about my family, I'm going to highlight these other two topics:

1. I will post photos of one scrapbooking craft (and maybe more, depending on the week!)....a card, a mini-album, a scrapbook page, etc. Hopefully this will help me make my favorite hobby more of a priority than it has been recently, and allow me to share with everyone what I've made.

2. I will post a weekly recipe, likely low-fat and low-calorie, and also made with low "GI" (Glycemic Index) ingredients. I've found some YUMMY recipes that are helping to make this weight-loss journey a little easier and I am just dying to share them with everyone!

So, check the right side of this page under "crafts & recipes" (under the Blog Archive) if you're in the mood for some crafty ideas or delicious and healthy recipes! Enjoy!!!

7.08.2009

Well, here we go...

I'm not sure I really have the time to dedicate to a blog, but I decided to justify it by telling myself that it will be a means to record my kids' milestones. When I ever find the time to finish (or in my son's case, start!) their scrapbooks, I'll have a record to look back on.