I have had several inquiries on how I print onto my die-cuts after they're already cut out on my Cricut, like I did for the
Monkey Birthday Invitations...so I decided to feature this topic for today's Scrappin' Saturday at
FCCB!

I don't know about you, but I prefer printed text over my own handwriting (which is messy!) on my layouts, because I know that I can correct mistakes before they're on my pages forever!!! :) So this is how I add journaling and printed text to my die-cut embellishments (including journaling blocks, page accents, card embellishments, and any other shape you want to add computer-generated font to) AFTER they are already cut out!
I have used the "Center Point" button on my Cricut to try and cut out a journaling block after I've already printed my text, but I find that I always manange to make it crooked or skewed, thus ruining the cut and the journaling.
So here's my method of ensuring even, centered journaling on whatever cut you decide to use:
1. In your word processing program, type your text exactly how you want it on your die-cut, making sure to leave enough space between them if you're printing multiple journaling spots:
2. Print out your text on regular printer paper. At this time, I place my die-cuts (which have already been cut to the size I need for my layout) over the text and adjust the size/spacing of the text as needed to make sure it all fits nicely within the cut. I typically print out several pages until I get it just right:
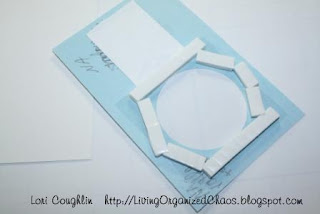
3. Add a very small amount of adhesive over the center of each journaling spot:
4. Turn your paper over, hold it up to a light or window and take your die-cut shapes and center them over the journaling area. By using only a tiny amount of adhesive, you can easily remove the die-cut and reposition it over the journaling:
Do this for each die-cut shape you want journaling on.
5. Run your paper back through your printer, with die-cuts attached, the same way it went through before:
6. When finished printing, you'll have perfectly placed journaling on your die cut:
7. Gently remove each die-cut shape and add to your project with additional adhesive:
That's it! I've never had a problem with my die-cuts separating from the paper in the printer or my paper jamming in my printer when the die cuts are going through, but I suppose each printer is different. I just have a very inexpensive HP Inkjet printer from Wal-Mart.
So that's my tutorial. I hope you found it helpful! Remember that you can do this on ANY shape your good ol' Cricut can cut...so experiment! And then let me know if you tried this and how it worked!
Happy Scrappin'!











.jpg)