CLICK HERE FOR FREE BLOGGER TEMPLATES, LINK BUTTONS AND MORE! »

9.27.2010

"Little Yankee" Layout: FCCB Challenge #29--Natl. Sewing Month!

This week's Fantabulous Cricut Challenge is called "National Sewing Month", in honor of...National Sewing Month! :) We had to use some type of stitching on our project, whether by hand, machine or even faux stitching. I went for the machine stitching, since I love the look of it and don't use it much...and now I remember WHY I don't use it much... Basically, I suck. HAHAHA!

I have had this paper for years and years...really. And I thought the colors went really well with the colors in the photo, so it finally got put to use. For the argyle (did I spell that right???) pattern, I cut diamonds with my Cricut (George and Basic Shapes), adhered them to the yellow carstock strip and then sewed diagonally across them to create the argyle look.

The title is from the Cricut Boys Will Be Boys cartridge (one of my new FAVES!)...I cut the base of the sentiment out, and instead of using the "man" part of the cut, I found the word "Yankee" in the Yankees font somewhere online and printed it out, cropping it to fit in the box. Perfect with the Noise Maker's little Yankee's outfit, huh? :)

Pretty simple layout, but I love the color combo and it's one of my most favorite pictures of my little guy! Hope you'll head over to FCCB and play along with this week's challenge with a sewn project of your own!

Happy Crafting! :)

9.22.2010

WINNER!!! Fantabulous Cricut Crawl...

Wow, thank you all for the wonderful comments on my Fantabulous Cricut Crawl project!  Your kind words made my day.  And it was also fun to find out what everyone's favorite subject in school was!  I'm surprised at how many people said "science" and "math"!?!?!?  :)

Okay, now for the winner of the CTMH Stamp Set for one person that left a comment, told me their favorite subject in school and is a current follower.  Chosen by Random.org.......#28 Meredith!

Congratulations!  You have two weeks to claim your prize.  Please contact me and give me your shipping address so I can get you this FANTABULOUS stamp set!

TheHouseHoldCEO(at)live(dot)com

9.21.2010

DIY Party & Holiday Decor By OhMyGluestick!

I know sooooo many people who say they aren't "crafty" and wouldn't know where to start on handmade party and seasonal decor.  Well, if you like the idea of having a "handmade" component to your party decor, but don't know how to go about doing that, I have a solution!

My friend, Tommie, from Oh My Gluestick designs the most AMAZING graphics that you can buy, cut/punch out and use for your own parties and seasonal decorations!  She can make custom invitations and then design party circles, treat bag toppers, and more...all coordinating in the color/theme you choose! 

The best part about it is that she emails you the graphic and for one (VERY reasonable) price, you can print them off as many times as you want!  This saves you from having to start from scratch, yet allows you to have the hands-on experience of making your decorations, all without breaking the bank!
For the Party Circles, just use a scallop or circle punch to punch them out and then glue to popsicle sticks or hang from ribbon as tags or decorations:

From this:
To this:
Or this:
HERE is a tutorial on how to use the Party Circles, from OhMy Gluestick.

For the Treat Bag Toppers, just print, fold in half and attach to the top of a treat bag for a custom, coordinating party favor!
How easy is that???

Other products offered by OMG include water bottle labels, party hats, banners, door decorations, cake toppers, and of course invitations and announcements.  Visit OMG's Etsy shop HERE for more info!

**All images are from Oh My Gluestick and are copyrighted.**

9.17.2010

Fall Pumpkin Topiary

Fall is soooooooo my favorite time of year!  I love the weather, the colors, the festivities AND the decorating!  This year, I don't have a plant in the urn on my front porch.  Poor thing didn't stand a chance in the Texas heat!  So I decided to make a pumpkin topiary to dress up my front porch.

I got all supplies for this topiary at Michaels.  The pumpkins were half off this week.  Because the white ones were so stark (and still look that way in the photo, though they're not) I used an antiquing medium mixed with several drops of brown re-inker and coated each pumpkin with it.  It gives an aged or slightly distressed/worn look.  I hot glued those together (after cutting off the stems) and added leaves between, where the hot glue was exposed. 

I didn't have enough leaves so I used my Cricut (Stretch Your Imagination, Wild Card) to cut some more.  I sprayed the leaf die cuts with water, scrunched them up and then dried them with my heat tool.  I inked the raised portions and the edges and they looked like beautiful fall leaves!  I hot glued those to a grapevine that I wrapped around the pumpkins.  I also added some brown raffia, twisted around the grapevine.
I set it in the urn, added some moss around the edges (sprayed with Ortho Max...no bugs allowed!!!) and I now have a pretty cool-looking decoration on my porch!

Thanks for looking and have a creative day!  :)

House Warming Card

I've been wanting to use this house card from the Cricut "Wild Card" cartridge since I bought it.  And I decided that making a house warming card for my friend Michelle that just moved was the perfect opportunity!

I used light brown cardstock for the house base and ran it through my Cuttlebug using the Mini Mosaic folder to give it the appearance of "stone".  Then I inked the raised area to give it some depth.  I cut out all the layers offered (door, window, roof and topiaries) and inked each of those as well.

On the door, I wanted to make a curtain, so I accordian folded a small piece of striped paper and adhered it to the inside of the door window.  Then I added a "welcome" banner and attached the brads slightly closer than the length of the banner so that it would stand out a bit.  Here's a close-up:
To make the card sturdier and to make the window look like a light was on inside, a cut the house in blackout mode 1/4" smaller than the card base and used those as mats on both sides of the inside of the house.

Thanks for looking and have a creative day!  :)

9.16.2010

Teacher Appreciation: Rolo Pencils!

Wish I could take credit for this idea.  Oh well.  It's actually an idea featured in the September 2010 issue of Creating Keepsakes magazine.  I fell in love with these the second I saw them, and decided they'd be a perfect little gift for my daughter's AWESOME pre-k teachers!

The body of the pencil (inside) is a package of Rolos and the tip of the pencil is a Hersheys Kiss attached to the Rolos with a glue dot!

To make the outside of the pencil, you cut a piece of yellow cardstock to 3 1/2" x 4 1/2", trim one short end with scallop edge or zigzag edge scissors, and score every 1/4" lengthwise...wrap around the Rolos and adhere.  Then wrap a 3 1/2" x 3/8 " piece of pink cardstock at the opposite end.  Add a small pink circle to cover the exposed end of the Rolos.  Cover the seam between the yellow and pink pieces with a length of silver foil tape.  Then just wrap the ends with a ribbon and tag.  I used Create a Critter to make the apples on these, and printed my sentiment from my computer right onto the tags.
To finish, I put them each in a clear bag and made a bag topper with each teacher's initial and some embellishments on them.  Super-easy and super-fun!

Thanks for looking and have a creative day!  :)

Monkey Birthday Invitations!

A while back, I made some pink monkey birthday invitations for my niece, Avery, for her first birthday:
My friend Jen asked if I could make some Monkey invitations for her son's sencond birthday. Soooooo, I thought to myself, "why re-invent the wheel"??? I just modified the original pink one I did, and made them for a boy! I made them very similarly, using my Cricut "Create a Critter" for the monkey cuts and the "Accent Essentials" cartridge for the green accent that mats the sentiment.  The monkeys "swing" on the leaf ribbon added to the top of each card!  They're attached with little metal rings that allow them to move freely on the invitation.
I used the same patterned paper (Hobby Lobby) in blue instead of pink. Everything else is the same as on the pink ones. I made 20 of these bad boys. Whew! Hope she likes them... :)

Thanks for looking and have a creative day!

9.13.2010

FANTABULOUS CRICUT CRAWL: Button Up For School!

Welcome to Organized Chaos and the second "Fantabulous Cricut Crawl": Button Up For School!  It's Fantabulous Cricut's version of a blog hop!

If you've come from visiting Melin at Cooking With Cricut, you're in the right place! If you've just happened across my blog and would like to play along with our Fantabulous Cricut Crawl, start HERE.

In honor of Back To School time, we're calling our second Fantabulous Cricut Crawl "Button Up For School"...each design team member will be featuing a button somewhere on their project!  Here's a sneak peek of mine...scroll down to see my project!
Each Design Team member will be featuing an original project featuring a button AND a Cricut cut somewhere on the project. Make sure to check out each DT member's blog for some awesome inspiration! There will be prizes along the way at our DT members' blogs, AND there will be a grand prize up for grabs at FCCB for one participant that submits a project meeting the the "Button Up For School" challenge criteria!

How fun is that?

Here's my project for the Crawl:
I made a card for my daughter's pre-k teacher using the Cricut "Just Because Cards" cartridge for the apple and layers, and the Storybook cartridge for the marquee-shaped frame.  All pieces were inked and the frame was popped off the page with foam adhesive.  The "bite" mark was made by punching a small scallop on the edge of the apple.

Where are the buttons???  Look closely...they make up the little worm peeking out of the apple!  I used four mini green buttons.  For the face, I used a white ink pen to outline the holes to make the eyes.  On the other three, I punched a small green circle and adhered the circles on top.  I also added little antenna!
You might be wondering what the rest of the sentiment says...well, here ya go:
Hee hee!  :)

Okay, time for prizes!!!  I am giving away a super-fun prize for the Crawl...a brand NEW full-size Close To My Heart clear stamp set!!!  The set is called "Piece of Cake" (retired!) and features different cakes and sentiments, perfect for using on those handmade birthday cards:
Here's how you can win this fabulous stamp set:
1.  Leave a comment on this post...let me know what your favorite subject was in school!
2.  Become a follower of my blog.
Now it's your turn! See if you can incorporate a button on your own "Button Up For School" project. Make sure to include a Cricut cut somewhere on your project, too!

Next stop...Leigh's blog, My Scrappy Journey.  Go see what she has in store for you today!  And when you're done, make sure to link up your project to FCCB's Fantabulous Cricut Crawl post to be entered into the contest for the GRAND PRIZE!!!!

Happy Crawling!

9.11.2010

FCCB Scrappin' Saturday: Job Layout Challenge!

I'm excited that we are having our first Scrappin' Saturday Layout Challenge today at Fantabulous Cricut (FCCB)!  I made the layout above for this challenge.

We are offering a prize...a Cricut Alphalicious cartridge goes to the winner!!!  The requirements are to make a layout about your job, featuring YOU, and to use at least one Cricut cut somewhere on your project.  Fun, right?  Participants have one week to complete their layout and submit to FCCB.

For my layout, I used the FABULOUS American Crafts Dear Lizzy collection papers.  These are leftovers from the class I took from Elizabeth Kartchner herself!  I love these papers...they just make me happy!
I used my Cricut George cartridge to cut the hearts and circles (to make the spiral flowers).  I lifted the edges of the hearts for dimension.
The spiral flowers, which I learned from Elizabeth Kartchner, are really simple.  You just spiral cut a circle (any size), leaving a small round portion uncut in the center of the flower.  Starting with the outermost end, begin rolling inward until you've reached the center.  Then just put a brad through the center of the flower (grabbing the innermost piece of the rolled flower) to secure it.  Using your hand, you can gently but firmly press down on the entire to flatten it out somewhat.
I also used the Street Sign cartridge for my title ("proof") and for the small arrows on the photos.  This layout is based on a sketch by PageMaps:
PageMaps is having a layout contest using this sketch.  The prize?  American Crafts Dear Lizzy collection products!!!  Hee, hee...

Happy Crafting!

8.30.2010

Fantabulous Cricut: "Road Trip" Car Card

This week's Fantabulous Cricut challenge is called "Road Trip":  Make a project incorporating a vacation or travel.  I love this car from the Cricut "Just Because Cards" cartridge.  It's so vintage and cool!

For this card, I cut the layers of the car and adhered them together, inking each of the pieces.  I added silver paint (paint pen) to the bumper to make it look more realistic.  Then I added rhinestones for the headlight and tailight.  I adhered a strip of embossed (Cuttlebug Swiss Dots folder) paper to the bottom of the card base and adhered the car to the card with foam dots.

To finish, I cut the sentiment, "Getting there..." and adhered it to the front and added flowers accented with mini buttons.  The inside says, "...is half the fun!".

Hope you'll head over to FCCB and check out the other FANTABULOUS design team projects!  Be sure to link up your own "road trip" project by next Sunday for your chance to win this week's prize!!! 

Happy crafting!  :)

8.28.2010

I Met "Dear Lizzy" Today!!!

The owner of my local scrapbook store won a contest, the prize for which was a class taught by Elizabeth Kartchner (aka "Dear Lizzy")!  Now if you know me well, you know that I absolutely idolize this girl!  I just love her scrapbooking style and if I had to choose a "celebrity" to meet, she would be it!!!  The second I heard she was teaching a class here I called and reserved a spot!

  Here's a photo of us from this morning:
She taught a super-fun class and we got a TON of the American Crafts Dear Lizzy Collection supplies!
We made this super-adorable layout, with my favorite...handmade flowers!  It's not done yet...I still need to add the main photo and a strip of smaller photos on the pink piece of cardstock:
And we also made a super-cute mini album out of just 4x6 photo protectors!  This one needs the photos, too.  After adding the photos, I'll punch the holes through the page protectors and tie the ribbon:
One product we used today that I fell in love with is the adhesive backed fabric paper...it's awesome!  You can fray the edges of it really easily to give that shabby chic feel to your projects.

Super-dork here also had Elizabeth autograph my "52 More Scrapbooking Challenges" book which she authored.  In my defnse, though, I wasn't the only one that asked her to!
This was seriously the highlight of my year!  Thanks Lizzy for a FABULOUS class!

8.26.2010

Margarita anyone??? TAG SWAP!

I am so excited I get to participate in my first swap!  Kathy over at Paper Phenomenon is hosting this one and we are swapping summer-themed tags.  How fun!

I decided to make a margarita tag...problem is, I don't have a margarita cut in my cartridge library.  :(  So, .cut file-searching I went until I came across Jade's blog, Handmade By Jade and her super-cute (and FREE!) margarita glass .cut file!  Go check out her blog...it's awesome!

I wanted the margaritas to look realistic and I think I accomplished that because every time I see them, I CRAVE a frozen margarita!  Hee, hee...  All pieces were cut using Jade's file and Cricut Design Studio.  The base is made from a thin chipboard, lined with white cardstock (with a green piece on the back).  Then I cut each margarita glass again in Bazzil Bling green cardstock.  I trimmed the green pieces to give me the inside drink and the top of the drink.  I also cut the glasses out of a transparency...then inked them with white Staz-On ink to make them look "frosted".  I adhered all of those layers together and had the base of my tag.
To embellish, I added layered flowers with green brads to the bottom of the glass.  Then I added Glossy Accents around the rim of the glass and sprinkled my new FAVORITE thing:  Diamond Dust.  This stuff is AWESOME!  It comes from Michaels and is made from ground up glass.  Just sprinkle it on and ta-da...instant salt rim!!!  (I also added some Diamond Dust to the brads in the flowers).

Next, I set a large eyelet in the upper left corner of the drink, and tied ribbons through.  For the lime, I used white shrink plastic and cut circles with my Cricut.  Then I drew the lime with a light green Sharpie marker, punched a hole in the corner and shrunk it with my heat gun.  I attached it to a ribbon with a silver ring.

So that's it!  I really hope my swap partners enjoy them.  Thinking about making one for myself now!  :)

Happy crafting!!!

8.25.2010

"Cherry On Top" Blog Award!

I am so tickled that Brandi from "Scubascrapper Brandi" chose me to receive the "Cherry On Top" blog award!  Thank you Brandi!!!

The rules for receiving this award:
1.  Thank the person that passed it to you (check!)
2.  Copy award to your blog (check!)
3.  List three things you love about yourself
4.  Post a picture that you love to your blog
5.  Pass the award onto 5 others

Three things I love about myself:
1.  I am creative...I love being able to think something up and create it using my hands.  I've been a crafty-girl for as long as I can remember!
2.  My love for my children...my heart can't keep it contained!  I know my kids know they are loved and that's the most important thing I can give them as a mother.
3.  My sense of humor...it's so important to be able to laugh at the little things when everything you see on the news and read in the paper seems so negative.
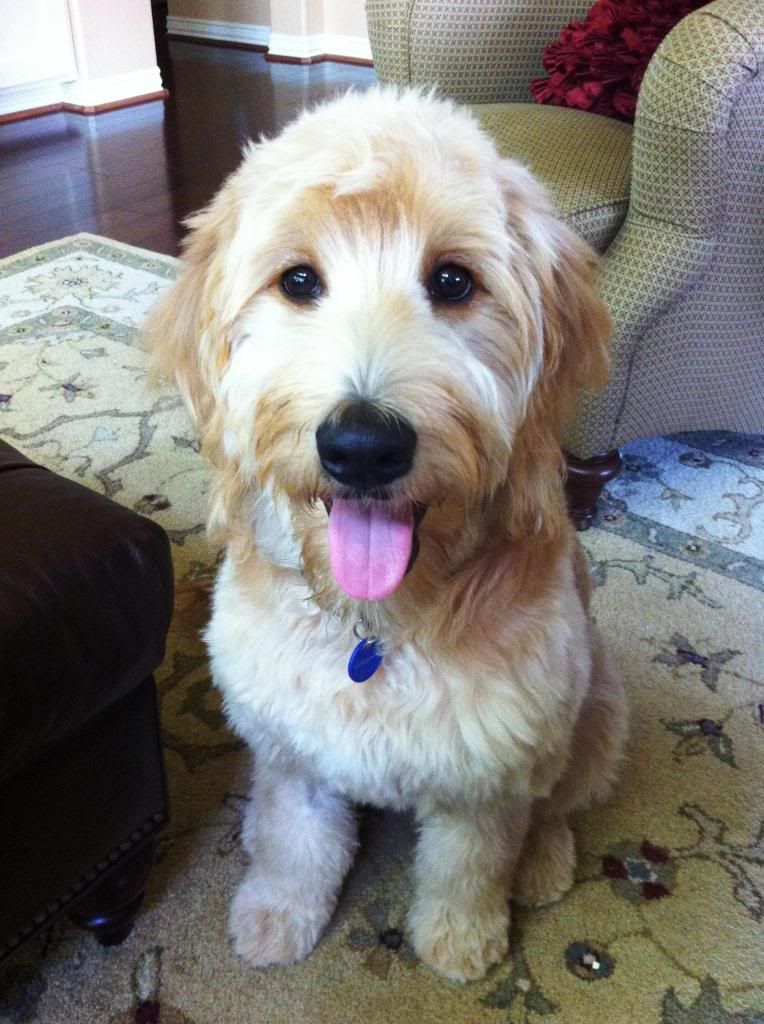
Here is one my most favorite photos at the moment...my dog, Duke, was just diagnosed with terminal lymphoma and I snapped this photo the day of his diagnosis.  It's bittersweet for me, because I know the day this was taken he was given his diagnosis, but I also see what a beautiful creature he is and how he will be missed...

Okay, time to pass this award on.  Here are my five:

1.  Linda at The Paper BoutiqueI love tutorials and this lady does them fabulously!  I love seeing what awesome new projects she'll teach me how to make next!

2.  Christine at Creating With Christine:  I just love her style and she posts some truly unique projects that are sure to inspire you!

3. Denise at Paper Pastime:  I love her super-creative projects and visit her blog frequently for inspiration!

4.  "The Bean" at Greenbean's Crafterole:  If you haven't seen Greenbean's AWESOME blog, you are definitely missing out!  She comes up with the most amazing ideas and turns them into FAB creations!

5.  Kathy at Paper Phenomenon:  I am addicted to mini albums and this is one of my go-to gals for inspiration!